- 02 Aug 2024
- 2 Minutes to read
Stand-alone license
- Updated on 02 Aug 2024
- 2 Minutes to read
Types of stand-alone license
There are two types of stand-alone licenses: a softlock key and a USB license dongle.
1. Softlock key
There are two different activation procedures for a softlock key license as described below.
1.1. Using Admin Control Centre
This is the recommended approach.
1.1.1. Generate C2V file (Retrieve licence information)
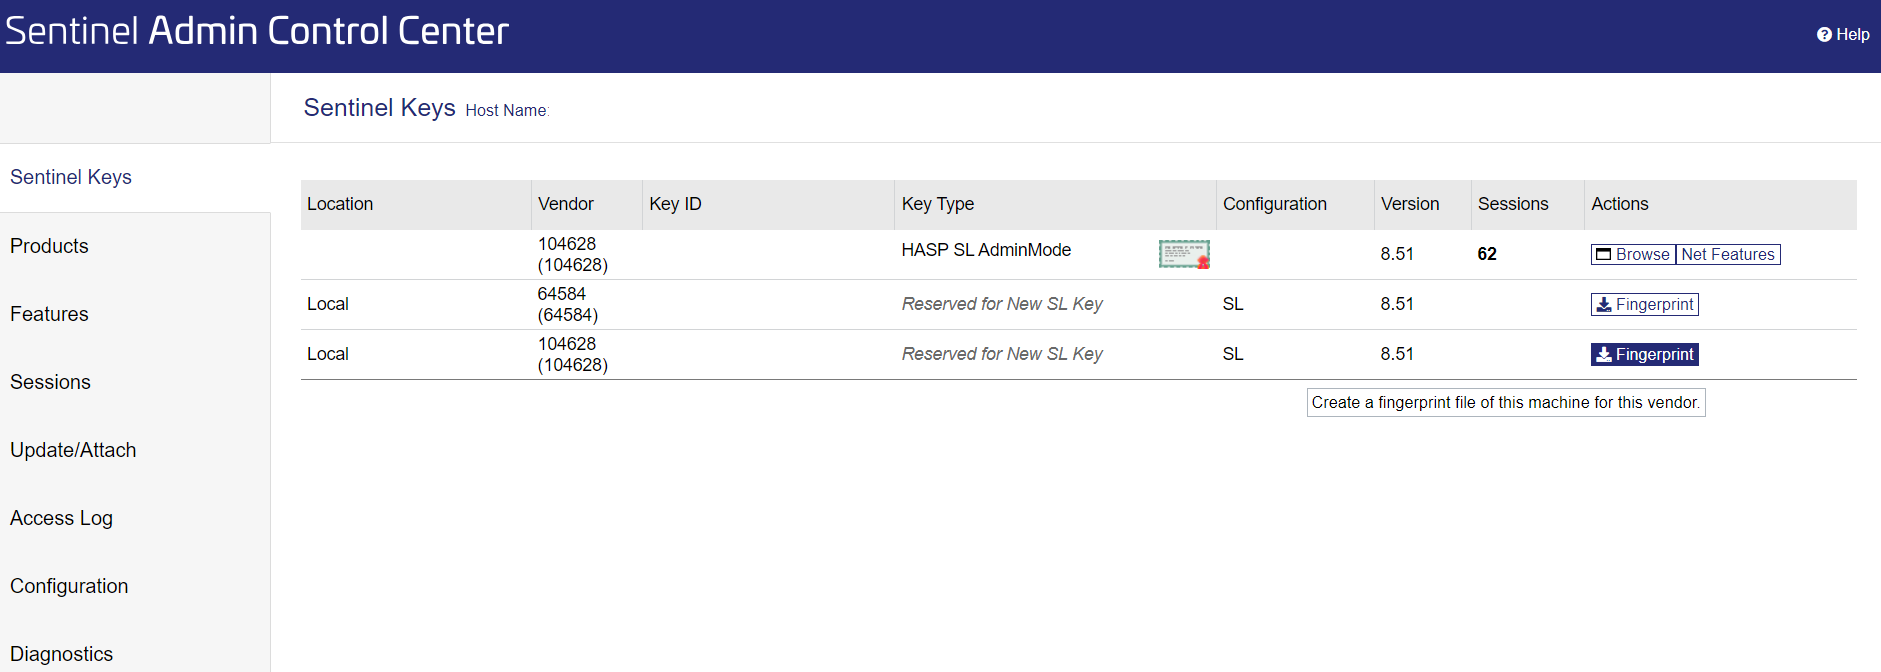
Find your protection key via the ‘‘Sentinel Keys’’ page (in the left menu) and click on <Fingerprint> (at the far right).
If there are more key slots available, select vendor ID 104628.

A file will be downloaded.
Send the downloaded file via email to the licence team.
1.1.2. Apply V2C file
You will receive a V2C file via email.
Save the V2C file.
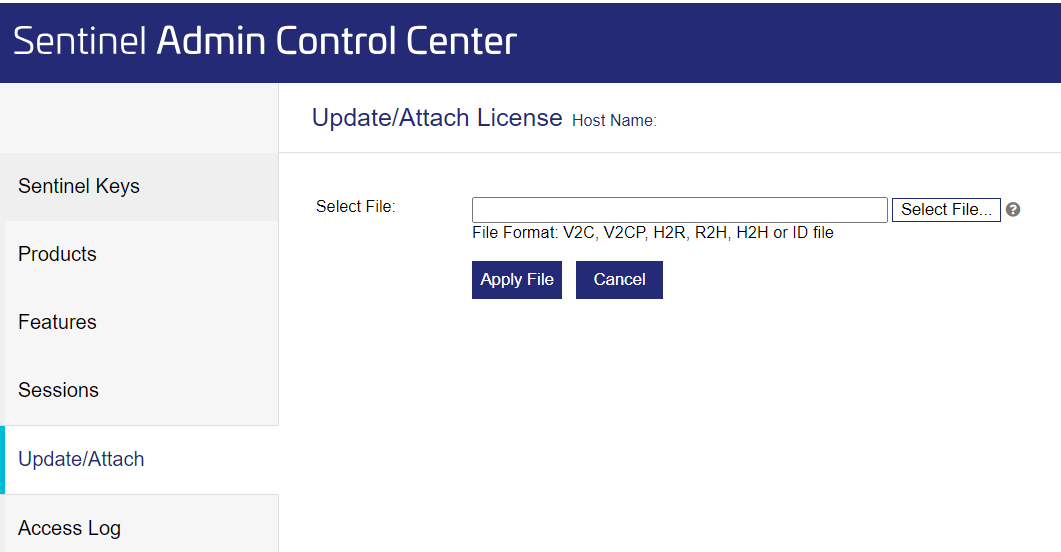
Go to the ‘‘Update/Attach’’ page.
Select and apply the V2C file.
Download the acknowledgement file after installing V2C file (or create a new C2V file for the key), and send it to licence team.

Update/Attach page in http://localhost:1947
1.2. Using licence Configuration Wizard
1.2.1. Generate C2V file
Open the License Configuration Wizard using the shortcut or running “ConfigureWizard.exe” in the folder C:\Program Files (x86)\Gexcon\licenceUtil.
Check “Get machine fingerprint” and click “Next”.
.png)
Click on “Save C2V file”.
Send the resulting C2V (Customer to Vendor) file to the licence team.
1.2.2. Apply V2C file
You will receive a V2C (Vendor to Customer) file via email.
Save the V2C file.
Open the License Configuration Wizard again.
Select “Apply license update” and load the V2C file.
Download the acknowledgement file after installing the V2C file (or create a new C2V file for the key), and send it to the licence team.
2. USB license dongle
Insert the USB dongle into your computer’s USB slot.
Follow one of the activation procedures described below.
2.1. Using Admin Control Centre
This is the recommended approach.
2.1.1. Generate C2V file (Retrieve licence information)
Insert the dongle into your PC.
Open http://localhost:1947/.
Enable “Generate C2V file for HASP key and submit”.
.png)
Configuration panel
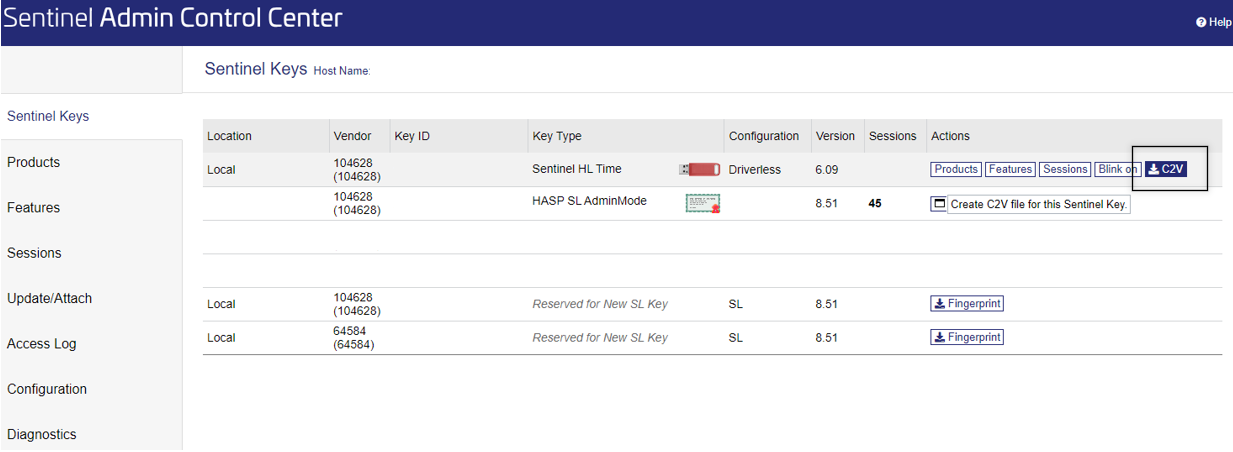
Find your protection key via the ‘‘Sentinel Keys’’ page (in the left menu)and click on C2V (at the far right).

If there are more keys, select the local Sentinel HL-NET-Time in the colour red.
Click on Create C2V File. A file will be downloaded.
Send the downloaded file via email to the licence team.
2.1.2. Apply V2C file
You will receive a V2C file via email.
Save the V2C file.
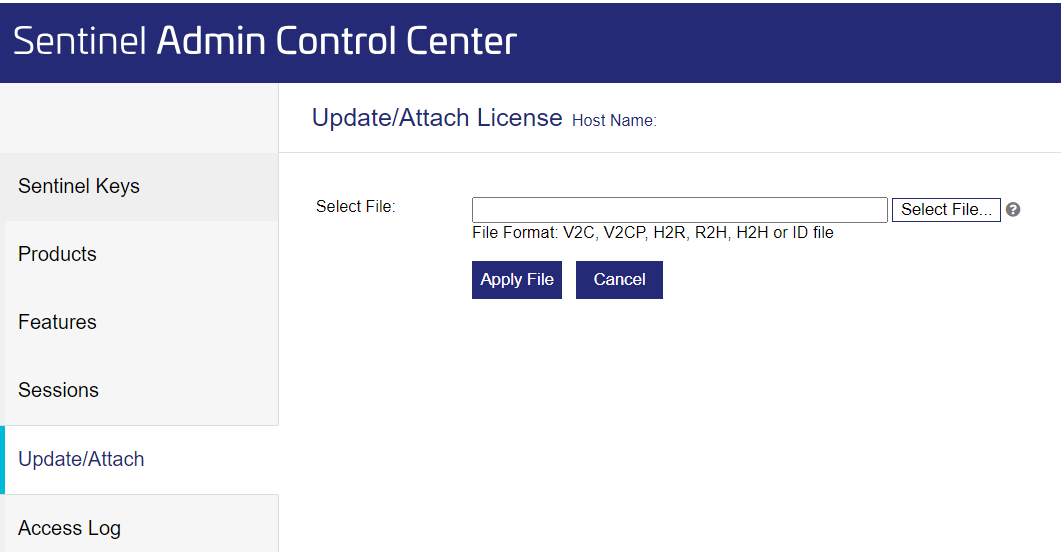
Go to the Update/Attach page.
Select and apply the V2C file.
Download the acknowledgement file after installing the V2C file (or create a new C2V file for the key), and send it to licence team.

Update/Attach page in http://localhost:1947
2.2. Using License Configuration Wizard
2.2.1. Generate C2V file (Retrieve licence information)
Insert the USB dongle into your PC.
Open the License Configuration Wizard using the shortcut or running “ConfigureWizard.exe” in the folder C:\Program Files (x86)\Gexcon\licenceUtil.
Check “Get machine fingerprint” and click “Next”.
.png)
Click on “Save C2V file”.
Send the resulting C2V (Customer to Vendor) file to the licence team.
2.2.2. Apply V2C file
You will receive a V2C (Vendor to Customer) file via email.
Save the V2C file.
Open the License Configuration Wizard again.
Select “Apply license update” and load the V2C file.
Download the acknowledgement file after installing the V2C file (or create a new C2V file for the key), and send it to licence team.
Updating/Renewing a licence
When a licence update or renewal is requested, the activation procedure with the C2V file needs to be followed again. Follow one of the full activation procedures again.

