- 02 Apr 2025
- 2 Minutes to read
RunManager
- Updated on 02 Apr 2025
- 2 Minutes to read
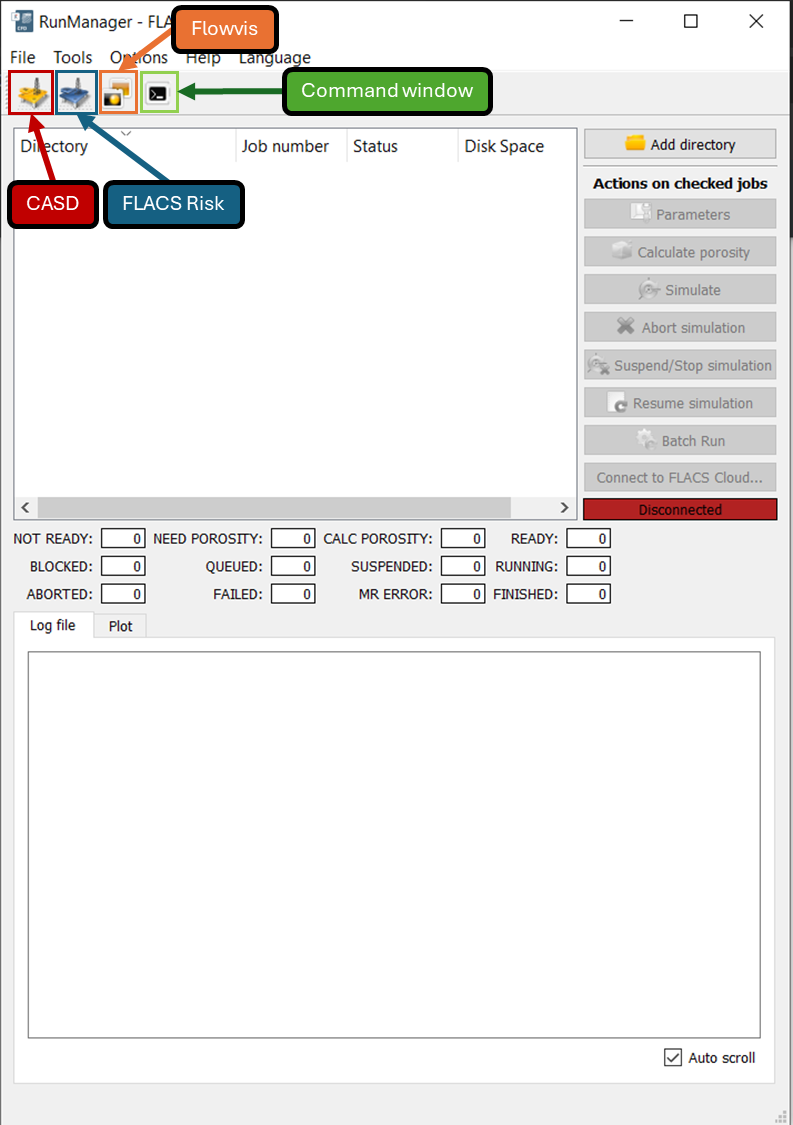
To start RunManager use the following commands or click on the desktop icon
Linux:
> run runmanagerWindows:
> "C:Program Files\Gexcon\FLACS-CFD_24.1\bin\runmanager"
Some of the main tasks of the RunManager are:
Starting the preprocessor, CASD
Running CFD simulations
Starting the postprocessor, Flowvis

The RunManager also monitors the simulations while they are running. To run a simulation locally follow the steps below:
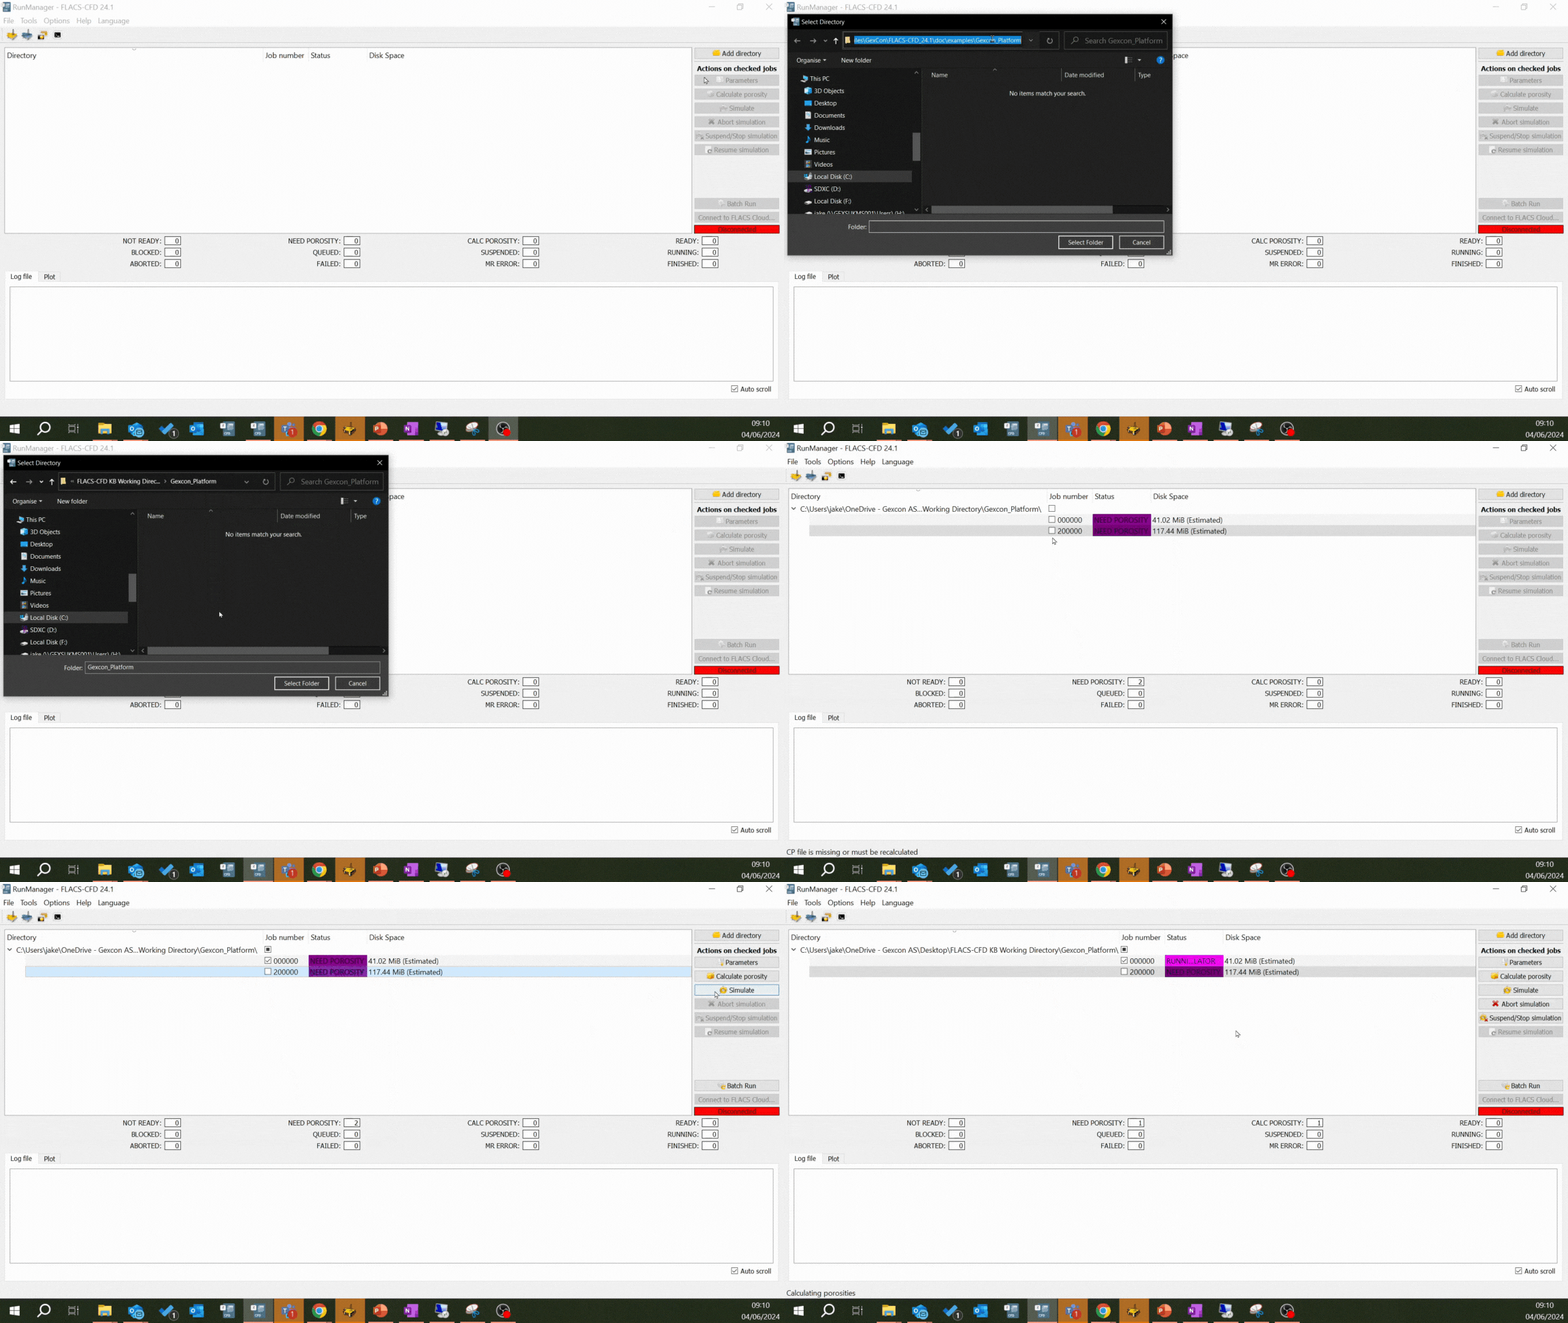
Click Add Directory and navigate to the directory with the scenario files, and then click Select Folder.
Click to expand the directory.
Click on the checkbox in the ”Job number” column next to the first job in the list (job number 000000), and click simulate.

FGC will first take several minutes to calculate the porosities, then the simulation will begin. You can follow the progress of the simulation by viewing the time scale at the bottom of the RunManager window.
There are a number of actions for checked jobs within the RunManager including:
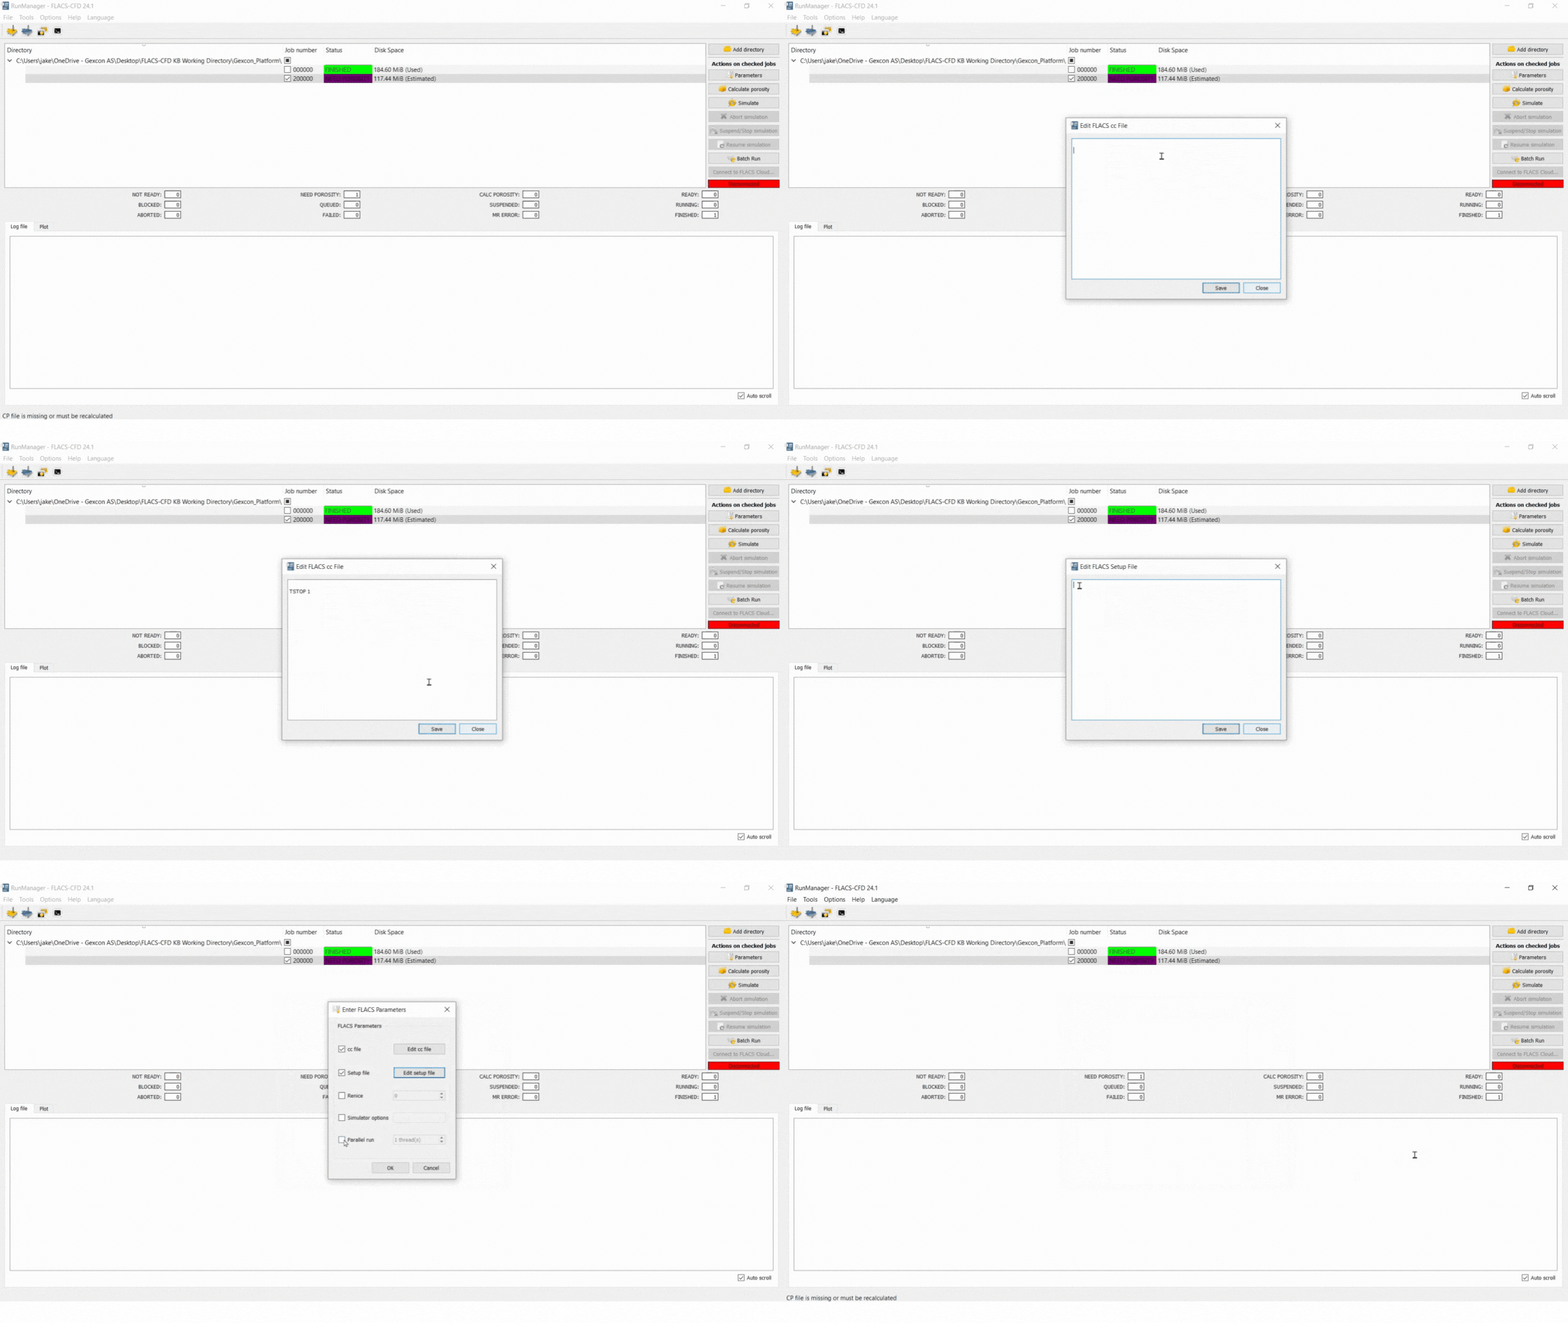
Enter FLACS parameters
Edit cc file - edit the runtime simulation control file - can be used to define output, generate or load dump files, terminate the simulation, etc.
Edit setup file - access advanced settings for specific models, timesteps, solver variants and various other parameters.
Renice - set the priority of the simulation process if running on Linux. Has no effect on Windows.
Simulator options - enables a text field where you can add simulator options in the form ”opt1=val1,opt2=val2” as you would do when starting FLACS from the command line.
Parallel run - use of the parallel solver - numerical input box used to define the number of CPU cores to assign to the simulator process.

Calculate porosity - calculates porosity for the checked simulations.
Simulate - simulates the checked job(s).
Abort simulation - kills the simulation process immediately. Should be used only when the user does not intend to use simulation results, as they are not guaranteed to be available in the output file.
Suspend/Stop simulation - gracefully interrupts the process, flushing all output to the output file along with all information needed for continuing the simulation later (via ‘Resume simulation’)
Resume simulation - only be activated when selecting simulations that has previously been suspended.
Other options include
Batch run - allows the user to select a number of simultaneous jobs and order them by priority
Connect to FLACS Cloud
Options tab - allows the user to change the default preferences for:
Threads used by the porosity calculator
Model used by the porosity calculator
Default number of threads for running simulations
Changes to the default plot window
Configure FLACS Cloud
Jobs and directories can also be removed by right-clicking and selecting remove. The directory can be rescanned to show newly added jobs also by right-clicking.
Monitoring the simulations
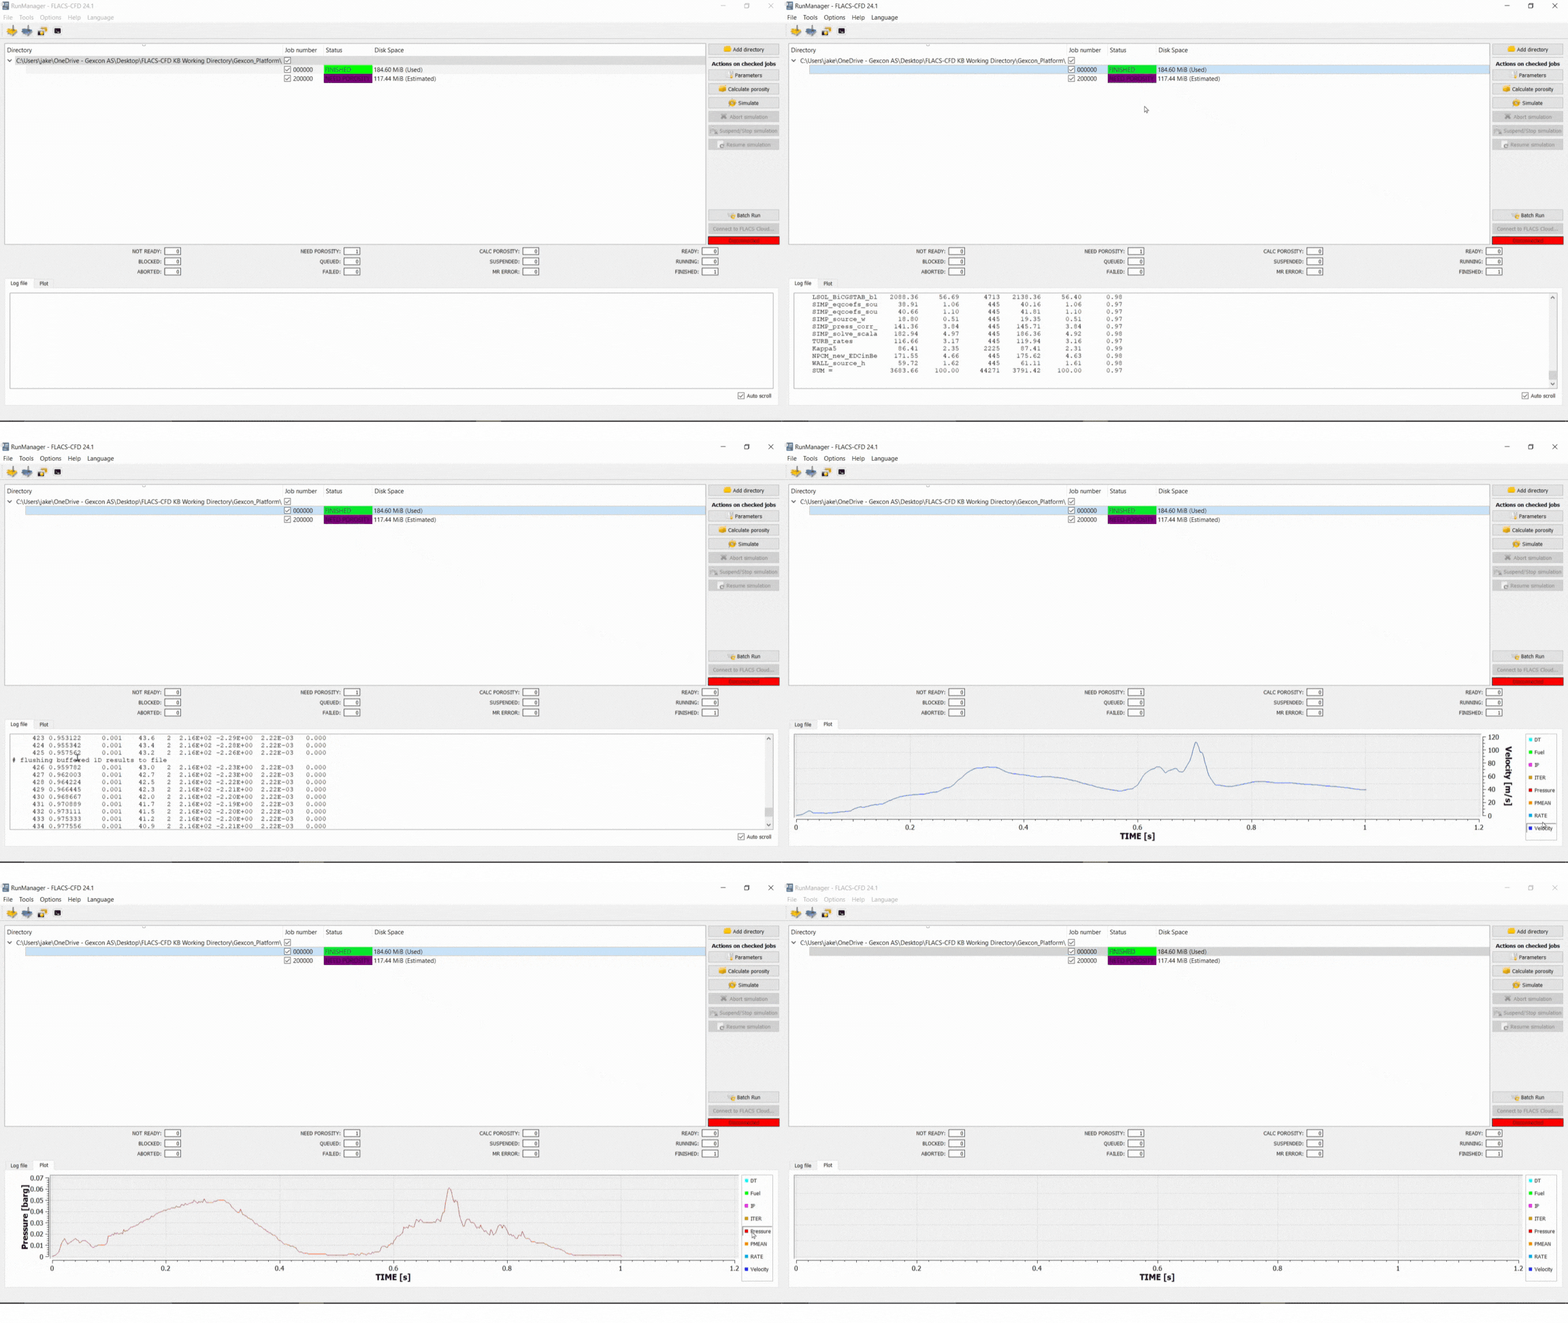
By selecting a job, the lower window will display the corresponding log file or show parameters of interest. The Log file tab or the Plot tab can be selected to switch between the different views.
Status displays the status of a simulation as one of the following: NEEDS POROSITY, READY, FINISHED, SUSPENDED or FAILED.
Disk Space used by computed scenarios is displayed in the last column. For scenarios not yet simulated, the required disk space is estimated based on parameters such as the number of grid cells, simulation duration, number of single field 3D outputs, number of monitor points and panels, MODD, NPLOT, DTPLOT, etc. For simulations that have finished, the actual used amount of disk space is displayed.


