- 25 Oct 2024
- 4 Minutes to read
Network licence
- Updated on 25 Oct 2024
- 4 Minutes to read
These steps should only be followed if the licence server (broadcasting the licences) is not going to be on the computer that also runs EFFECTS/RISKCURVES. A configuration is needed for both the Network licence server (computer holding your licence key) and the client computer (computer intended to run the Gexcon software tool, connecting to the licence server when requesting permission to run the tool).
Gexcon ← Network licence server ← Client computer
1. How to set up my network licence
The Sentinel HASP/LDK licence server needs to be installed on this dedicated licence server. Special “Network licence manager” installation procedures are available for both Windows and Linux servers, which will install both the licence server and a required vendor library file.
Note that this is a task for the authorised IT system administrators
1.1. Enable client access to the Network licence server
Login directly on the licence server.
Then, go to page Admin Control Center of your licence server http://<IP-address>:1947.
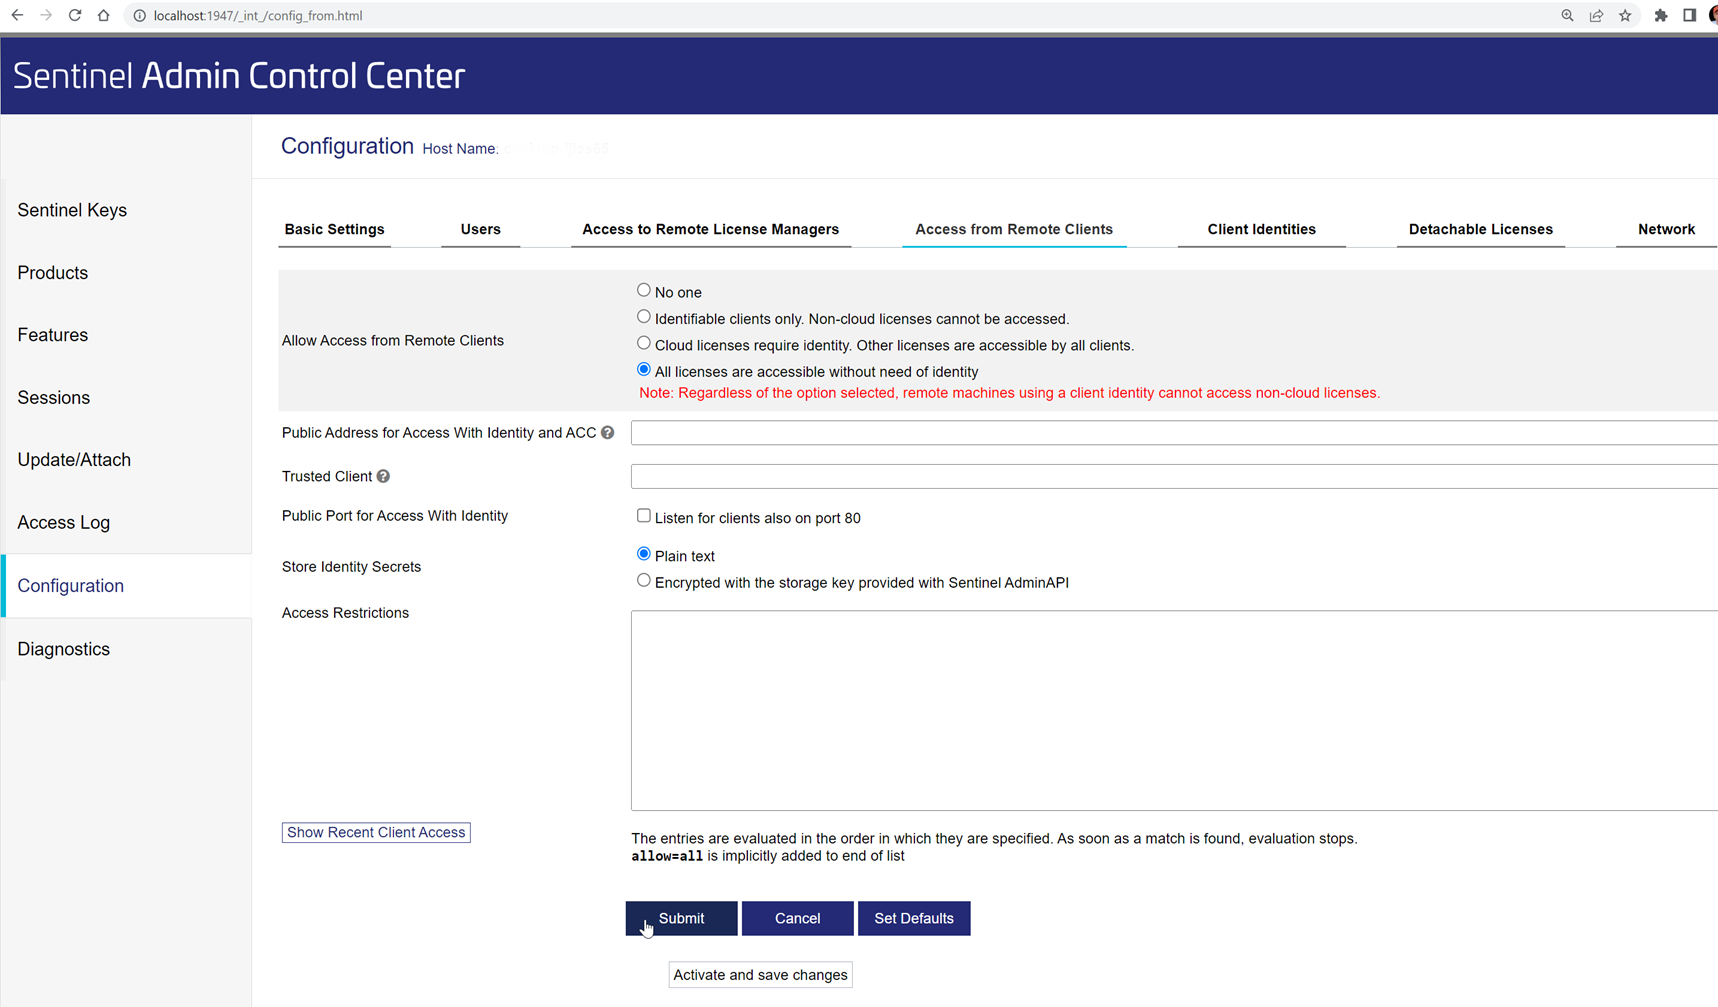
In the Configuration page select the tab ‘‘Access from Remote Clients’’.
Enable ‘‘All licenses are accessible without need of identity’’.
Click on 'Submit'.

Configuring a licence server in an Admin Control Center
1.2. Activation process Network licence server
Perform the “activation” process, which can be performed through Sentinel Admin Control Center.
Activation process Network licence server - Softlock key
Generate C2V file
Login directly on the licence server.
Open Admin Control Center of your licence server http://<IP-address>:1947.
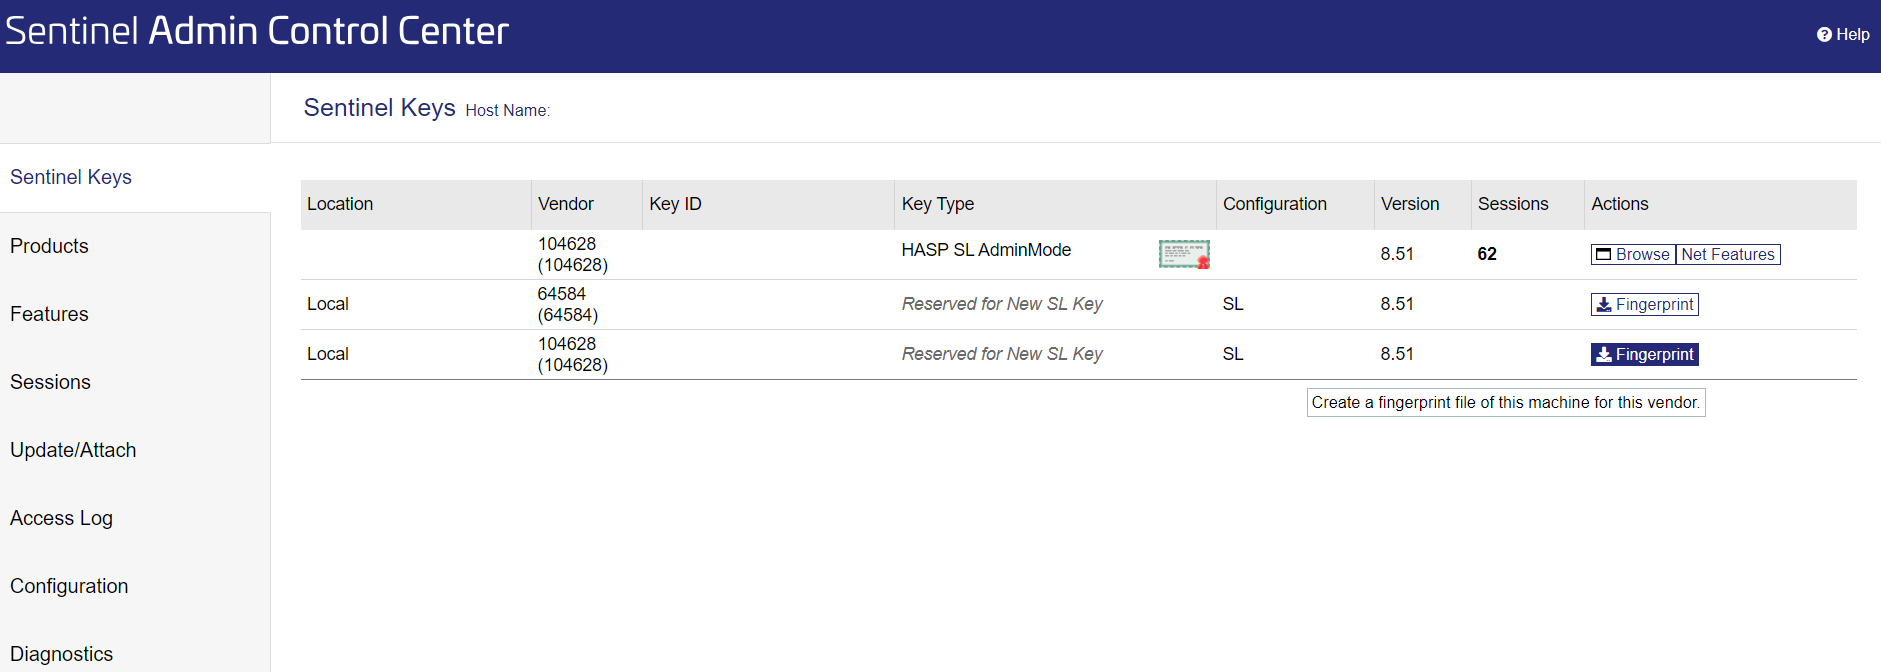
Find your protection key via the ‘‘Sentinel Keys’’ page (in the left menu) and click on <Fingerprint> (at the far right).

Creating a C2V file on Sentinel Keys page for Softlock key
If there are more key slots available, select select vendor ID 104628.
A file will be downloaded.
Send the downloaded file via email to the licence team.
Apply V2C file
You will receive a V2C file via email.
Save the V2C file.
Open the Admin Control Center of your licence server http://<IP-address>:1947.
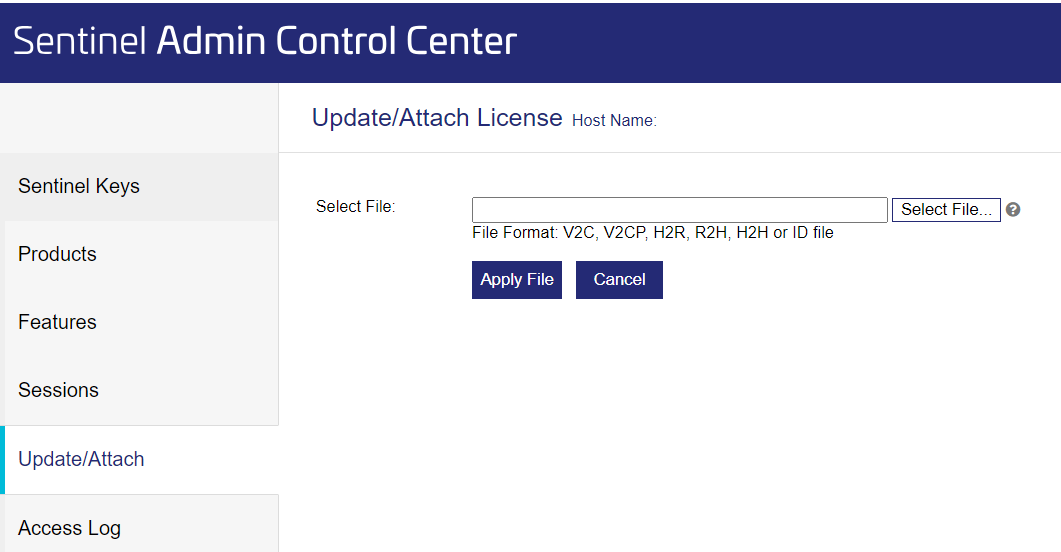
Go to the ‘‘Update/Attach’’ page.
Select the V2C file and press <Apply File>.
Download acknowledgement file after installing V2C file (or create new C2V file for the key), and send it to licence team.

Update/Attach page in http://localhost:1947
Activation process Network licence server - USB licence dongle
Generate C2V file
Insert the dongle into your licence server (can be handled remotely).
Open the Admin Control Center of your licence server http://<IP-address>:1947.
In Configuration enable “Generate C2V file for HASP key’’ and <Submit>.
.png)
Configuration panel
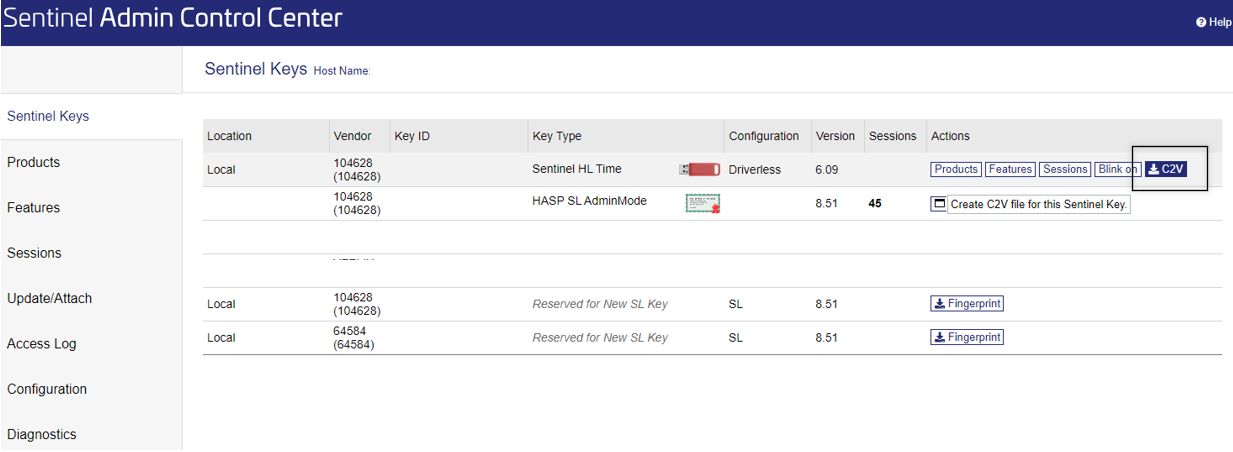
Find your protection key via the ‘‘Sentinel Keys’’ page (in the left menu)and click on C2V (at the far right).

Creating a C2V file on Sentinel Keys page for the dongle HASP key
If there are more keys, select the local Sentinel HL-NET-Time in the colour red with vendor ID 104628.
Click on Create C2V File. A file will be downloaded.
Send the downloaded file via email to the licence team.
Apply V2C file
You will receive a V2C file via email.
Save the V2C file.
Insert the dongle into your licence server.
Open the Admin Control Center of your licence server http://<IP-address>:1947.
Go to the ‘‘Update/Attach’’ page.
Select the V2C file and press <Apply File>.
Download the acknowledgement file after installing the V2C file (or create a new C2V file for the key), and send it to licence team.
2. Actions to perform on a Client computer
Install the EFFECTS/RISKCURVES setup on the client machine before. This will also install the licence manager runtime. The configuration of the licence per user can be done through Sentinel Admin Control Center (recommended) or via a dedicated hasp_104628.ini file (advanced).
2.1. Connect each client computer via the Admin Control Center
Login directly on the client computer.
Then, go to the Admin Control Center of your licence server http://localhost:1947.
In the Configuration page select the ‘‘Access to Remote License Managers’’ tab.
Enable “Allow Access to Remote Licenses” and ‘‘Broadcast Search for Remote Licenses’’.
In the ‘‘Remote License Search Parameters’’ enter the license server’s name and IP address as follows. In the<hostname of licence server> is the hostname of the licence server holding your licence key, and in the <IP of licence server> is the IP of the licence server holding your licence key.
<hostname of licence server>
<IP of licence server>
Click on <Submit>.
.png)
Example to illustrate how to add the hostname and IP of your licence server
2.2. Check the activation key (optional)
On each client computer, you can check whether your licence key is listed:
Login directly on the client computer.
Then, go to the 'Sentinel Keys' page in Admin Control Center of the client computer at http://localhost:1947 and check that your licence key is listed under the 'Key ID' column.
Advanced configuration option: .ini file
This is useful if you want to access specific licence servers. The hasp_104628.ini file would only affect licence from Gexcon, and it is optional (normally not required to make the licence work). The location of the hasp_104628.ini file is: C:\Users\USER_NAME\Appdata\Local\Safenet Sentinel\Sentinel LDK\hasp_104628.ini
Example hasp_104628.ini file for specific licence servers:
broadcastsearch = 0 serveraddr = 10.0.0.1 serveraddr = 10.0.0.2 disable_IPv6 = 0 | (or untick broadcast search in the web interface) (or enter these addresses in the web interface) |
|---|
Example hasp_104628.ini file for any detected licence server:
broadcastsearch = 1 aggressive = 1 disable_IPv6 = 0 |
|---|
3. Updating/Renewing a licence
When a licence update or renewal is requested, the activation procedure with C2V file needs to be followed again. Follow the activation procedure in chapter 1.2 ’’Activation process Network license server’’.

