- 22 Jul 2024
- 2 Minutes to read
How to georeference a background map
- Updated on 22 Jul 2024
- 2 Minutes to read
Georeferencing pixel-based files
EFFECTS and RISKCURVES support pixel-based files such as JPG, PNG, TIFF, GIF and BMP. These files can be used in a relative system or georeferenced for export into GIS systems. Since pixel-based files are composed of a grid of individual pixels, they offer detailed visual representations of geographic areas but are resolution-dependent and can lose clarity when scaled.
To georeference a pixel-based image (e.g., a screenshot or a process flow diagram) in EFFECTS or RISKCURVES, you need either:
A geographically marked reference point and a reference length on the image, or
Two geographically marked reference points.
Let’s have a look at the steps required to georeference a pixel-based image.
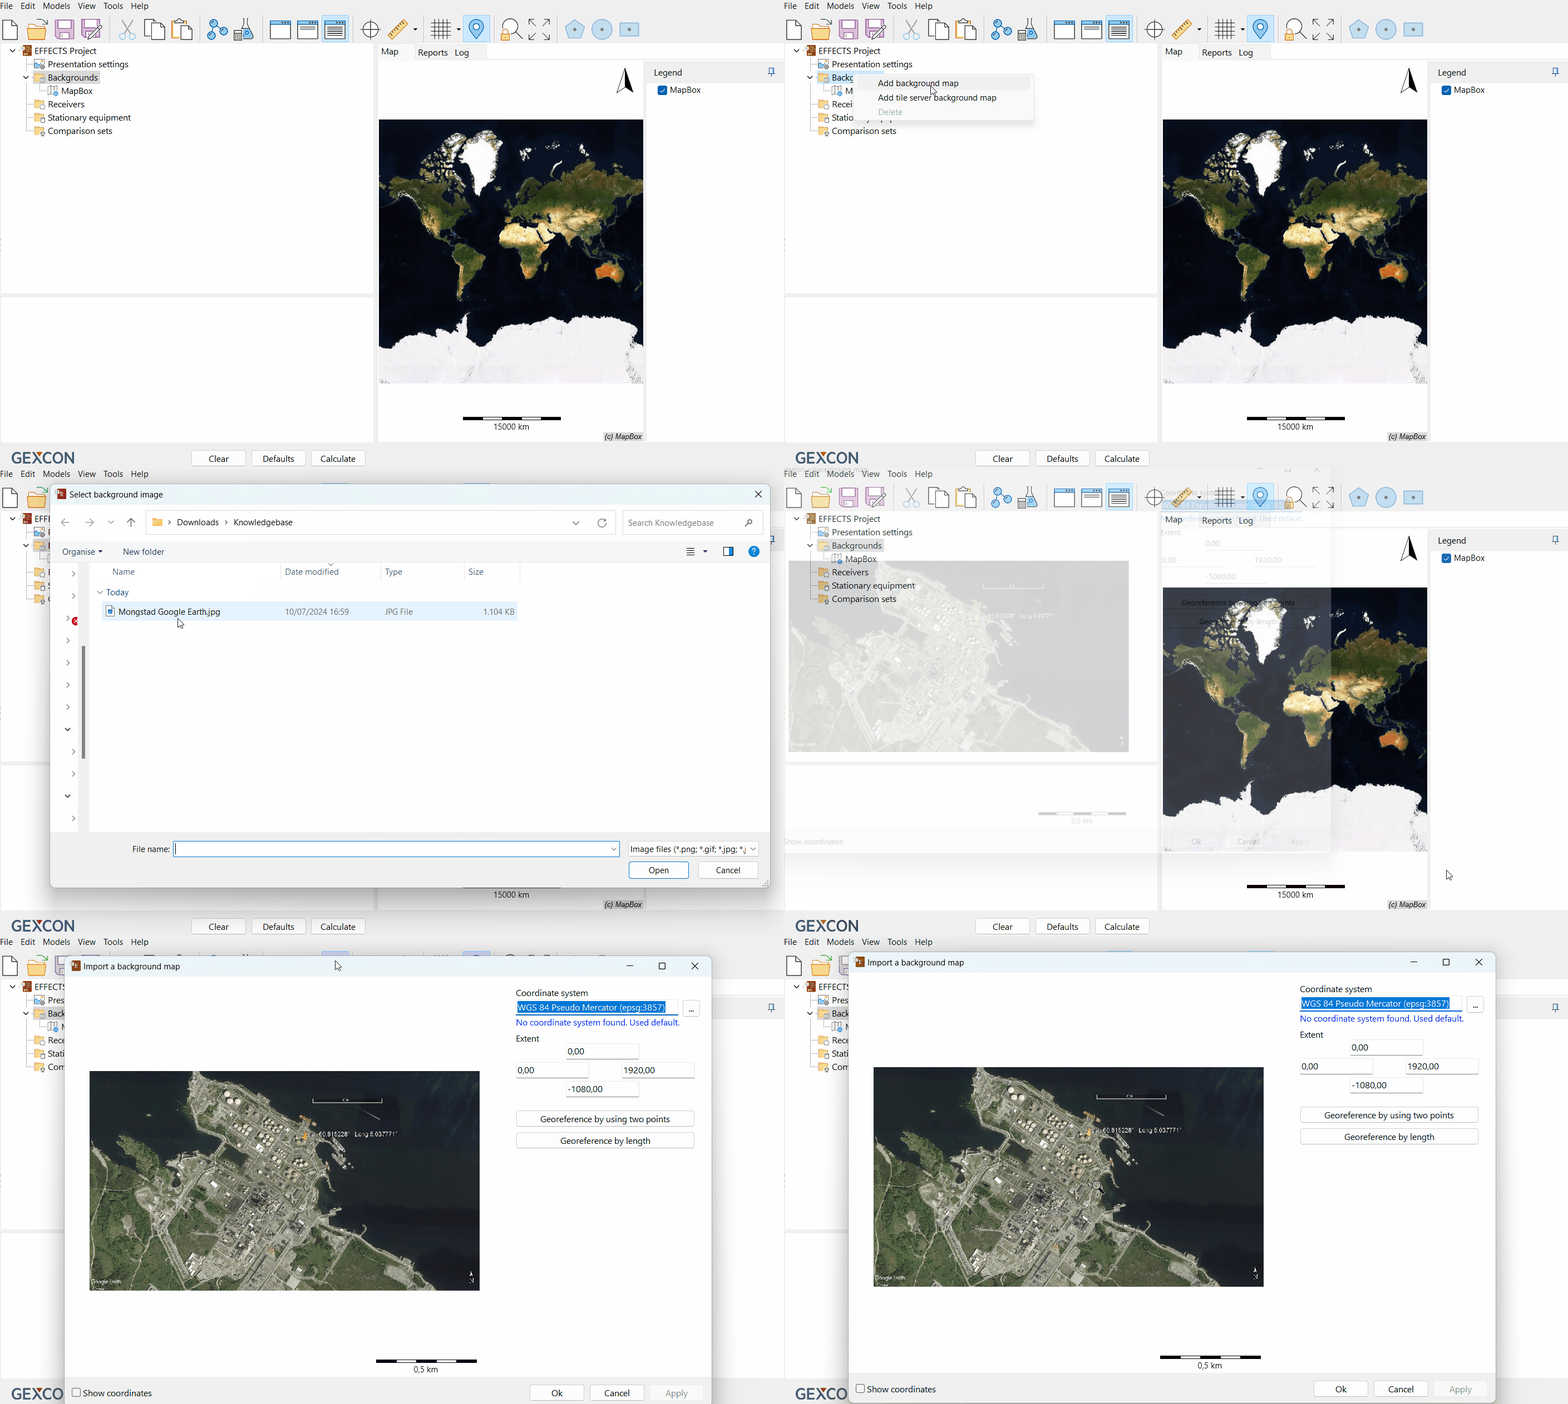
Upload the background map
Right-click on the 'Backgrounds' node in the project tree.
Select 'Add background map'.
Navigate to the folder where you saved the pixel-based image (e.g., JPEG) that you would like to georeference and use as your background map.
Click 'Open'.
Import and georeference
The 'Import a background map' window will open.
Here you will enter the georeferencing details for your map.
Choose georeferencing method
The import window will offer two import options. Georeference by length and Georeference by using two points.

Adding a background map (image file)
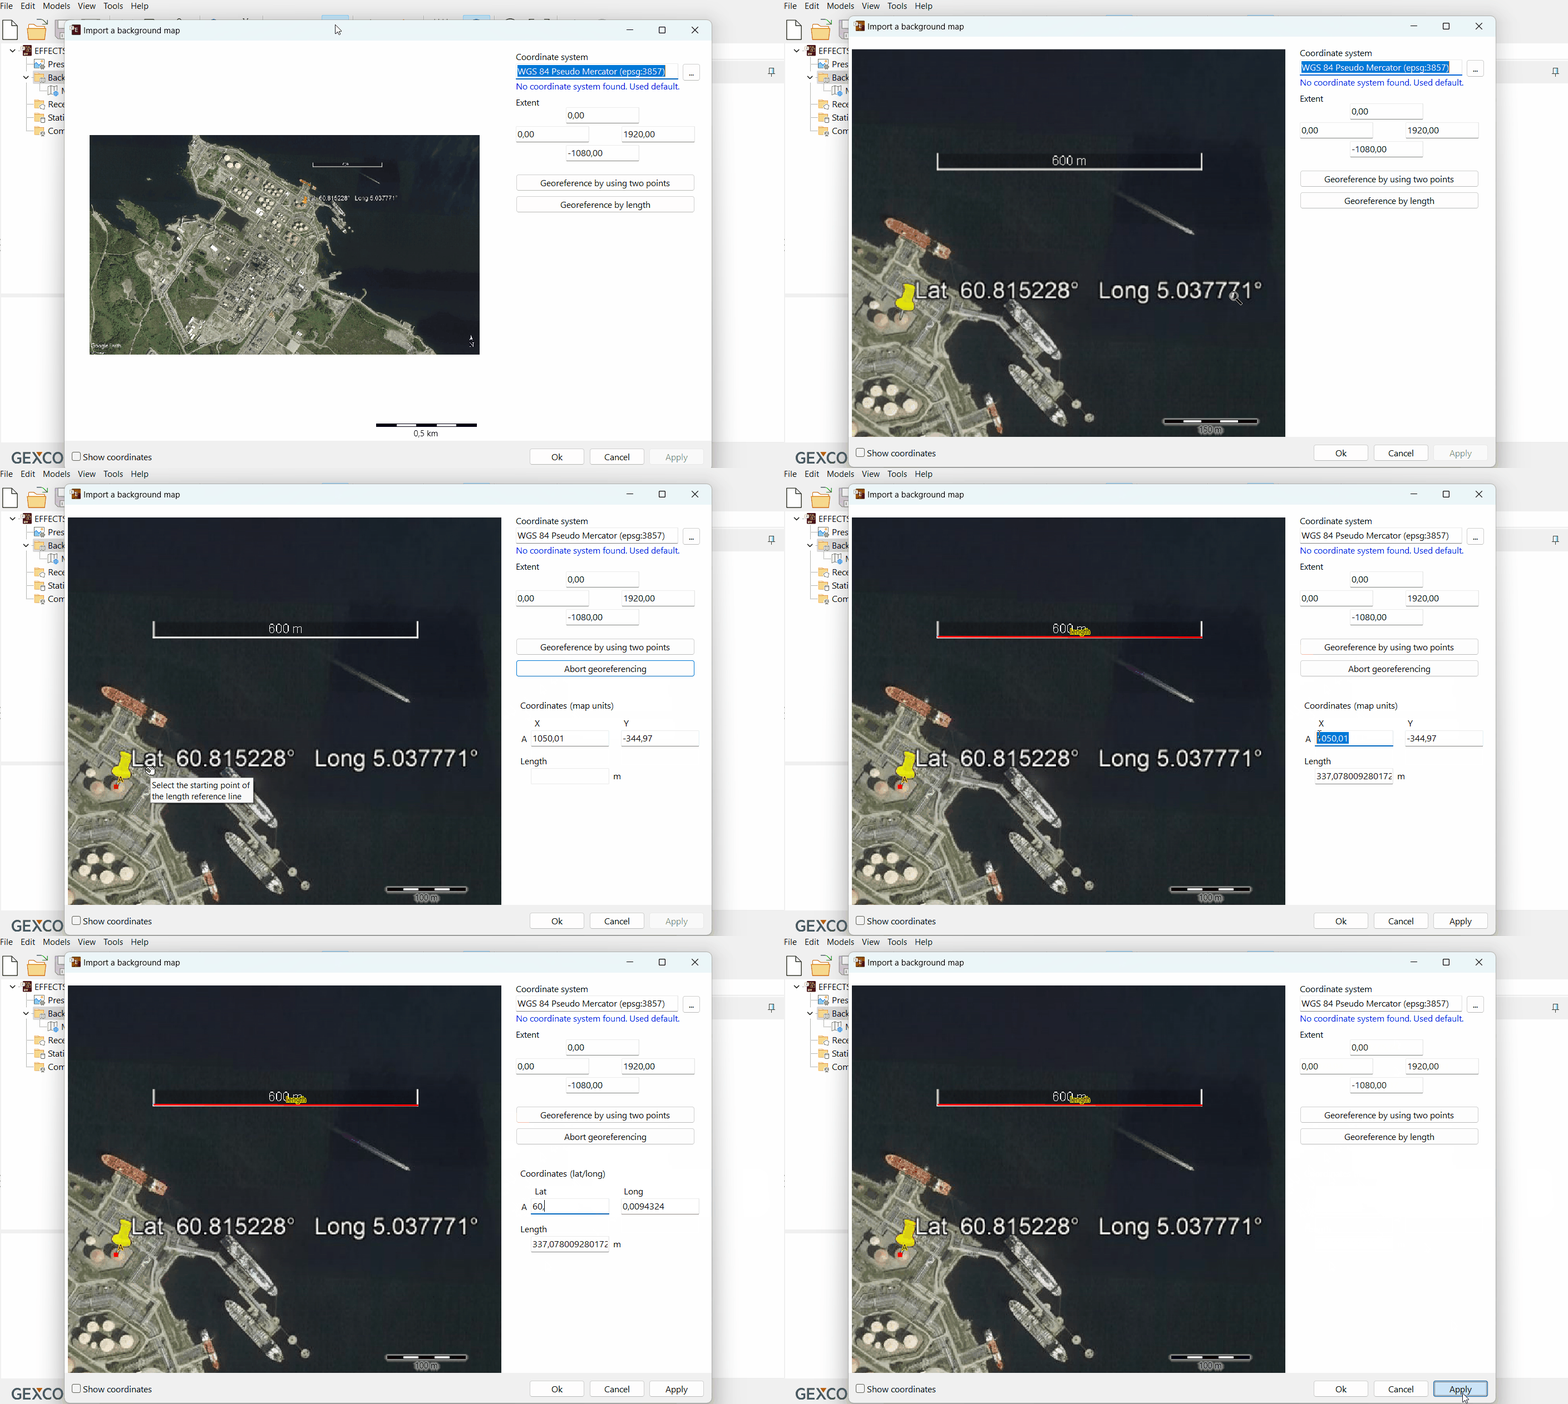
A. Georeference by length
Select the correct coordinate system (in this case the default coordinate system is used).
Choose ‘Georeferencing type = by length’ and follow the cursor instructions.
Select a reference point with known coordinates on the image.
Define the starting and ending point of the length reference line.
Choose the coordinate type on the right (Map Units or Lat/Long).
Enter coordinates of reference point A.
Enter reference length.
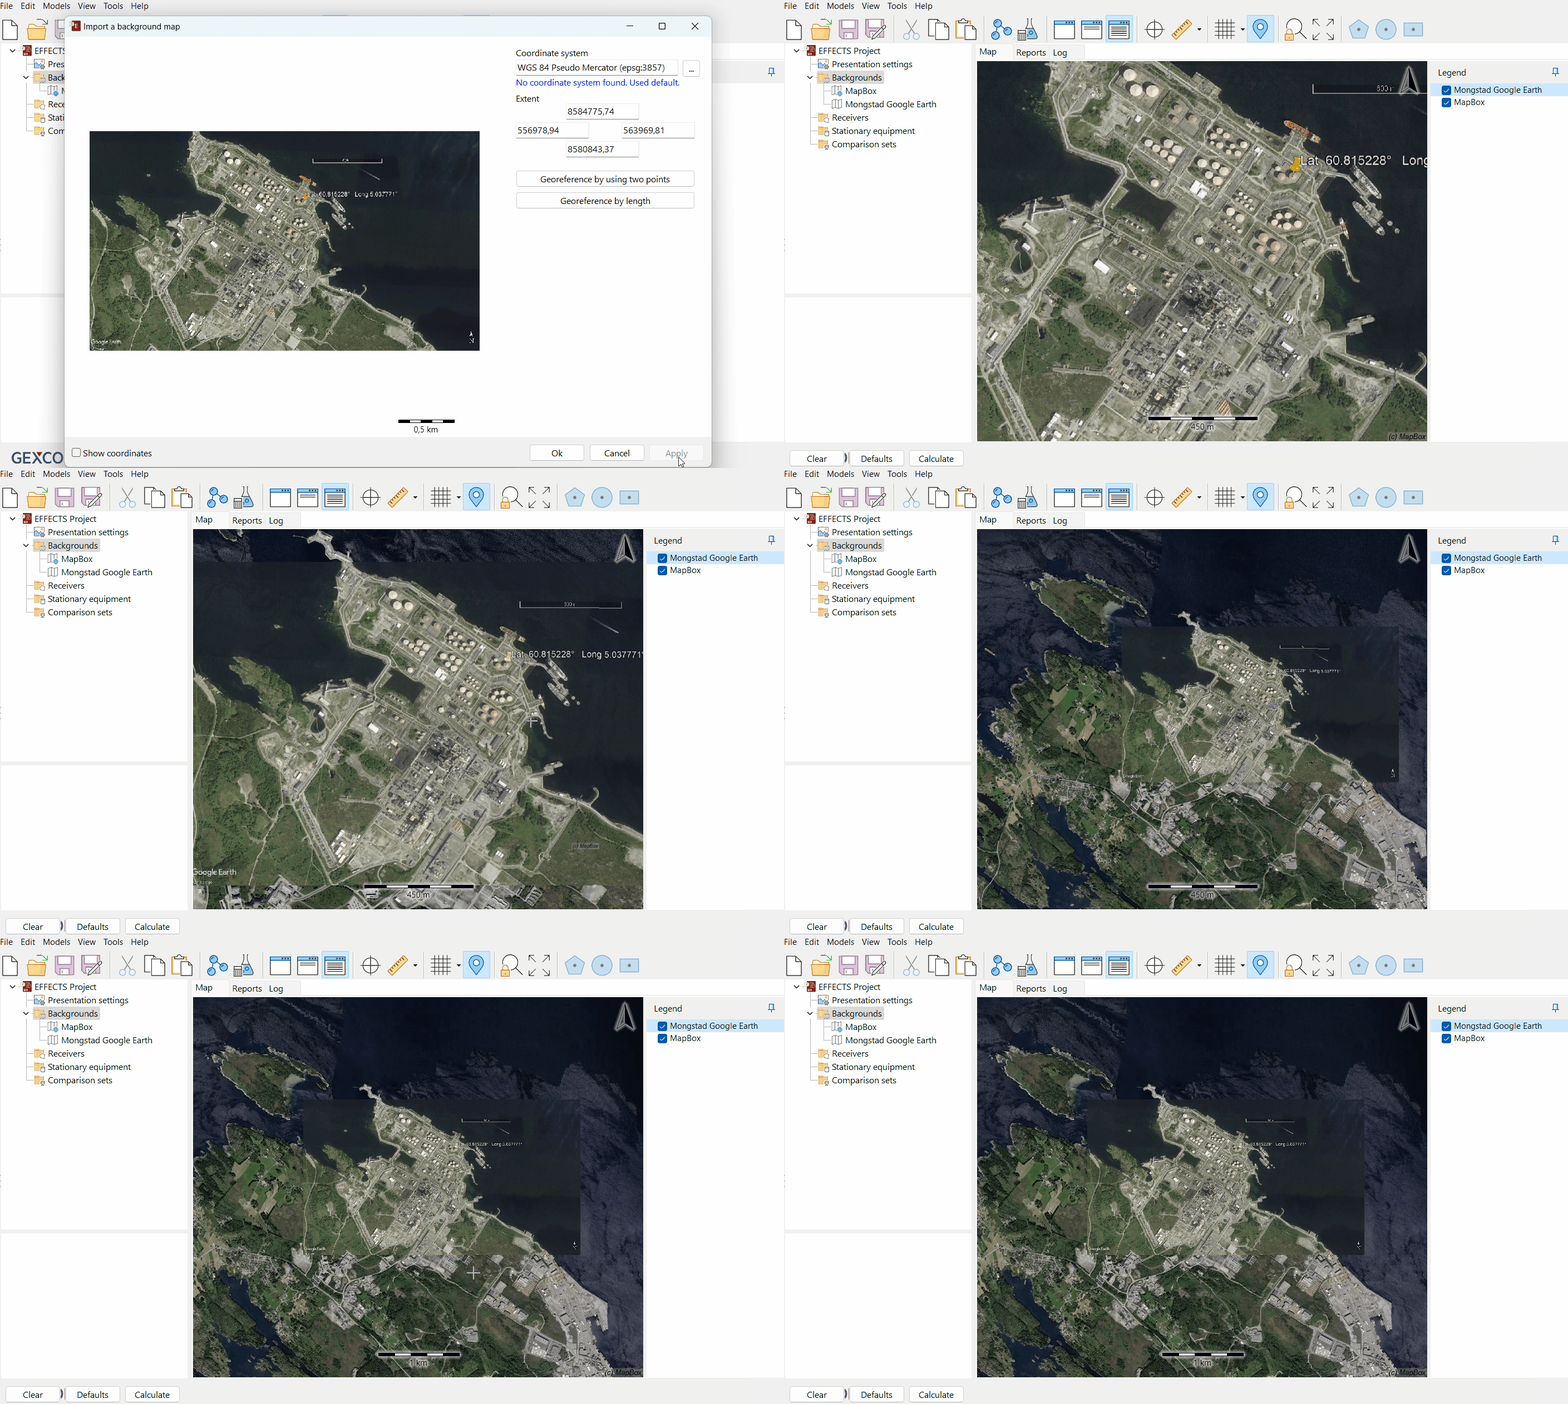
Press ‘Apply’.

Georeferencing by length
Check if the picture was georeferenced correctly in the map view.

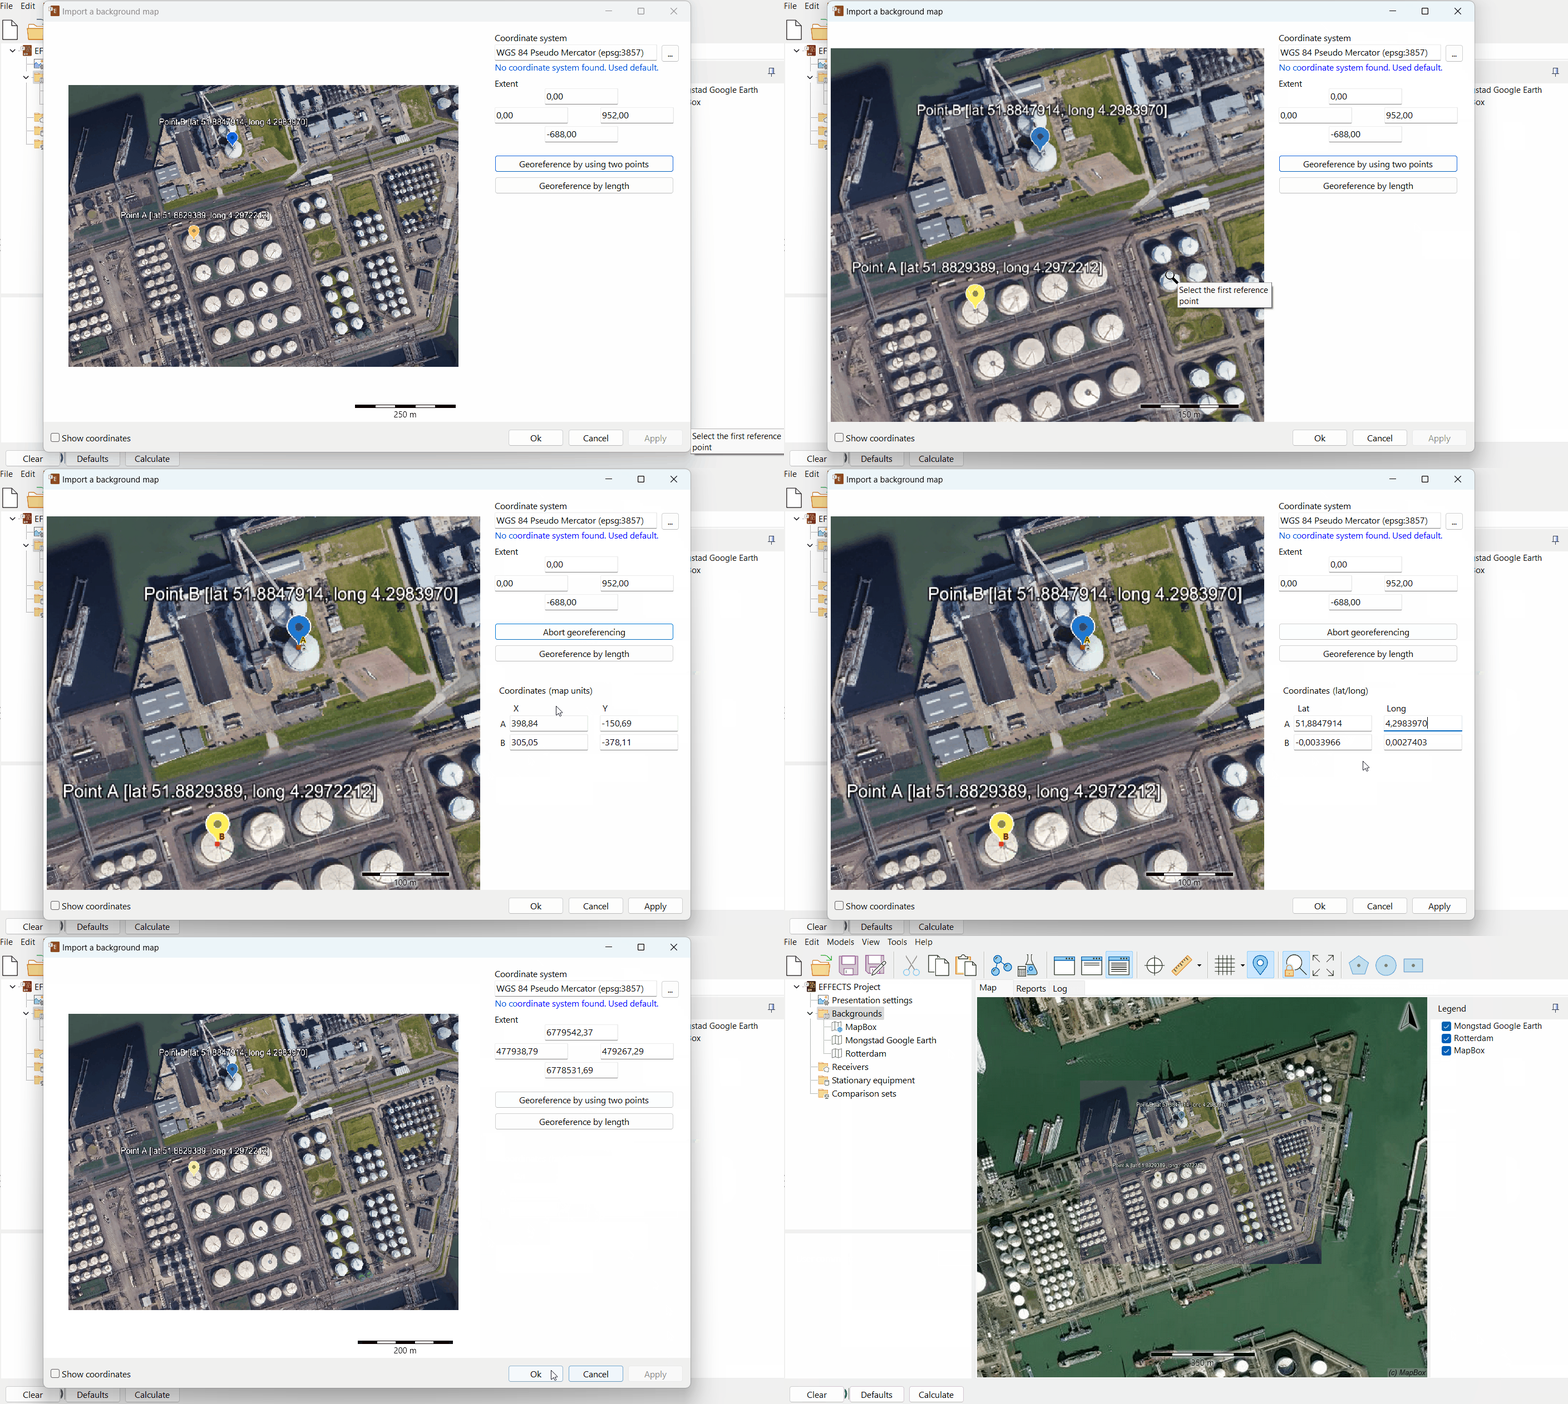
B. Georeference by using two points
Select the correct coordinate system.
Choose ‘Georeferencing type = by using two points’ and follow the cursor instructions.
Select the first and second reference points with known coordinates on the image.
Choose the coordinate type on the right (Map Units or Lat/Long).
Enter the coordinates of both reference points A and B.
Press ‘Apply’ and verify the map in the map view.

Georeferencing vector-based maps
Vector-based maps, such as shape files and DXF files (e.g., AUTOCAD drawings), can also be used. These maps include a scale and may have a coordinate system. They use mathematical equations and geometric shapes to represent geographic features, ensuring they can be scaled infinitely without losing quality. This scalability and precision make them ideal for applications requiring detailed and flexible map visuals, such as geographic information systems (GIS).
Let’s have a look at the steps required to georeference a vector-based image.
Upload the background map
Right-click on the 'Backgrounds' node in the project tree.
Select 'Add background map'.
Navigate to the folder where you saved the file that you would like to georeference and be used as your background map.
Click 'Open'.
Import and georeference
The 'Import a background map' window will open. This is where you will complete the georeference details of your map.
Select the correct coordinate system (in this case, it is already selected).
Press ‘Apply’.
.gif)
By following these steps, you can effectively georeference both pixel-based and vector-based maps in EFFECTS and RISKCURVES, enabling accurate and useful background maps for your projects.

