- 02 Aug 2024
- 2 Minutes to read
How to add a tile server
- Updated on 02 Aug 2024
- 2 Minutes to read
As described in the article "Working with background maps", tile servers play a crucial role in providing background maps composed of images (tiles) retrieved from online servers. Here is how to add a tile server to your project:
Adding a tile server
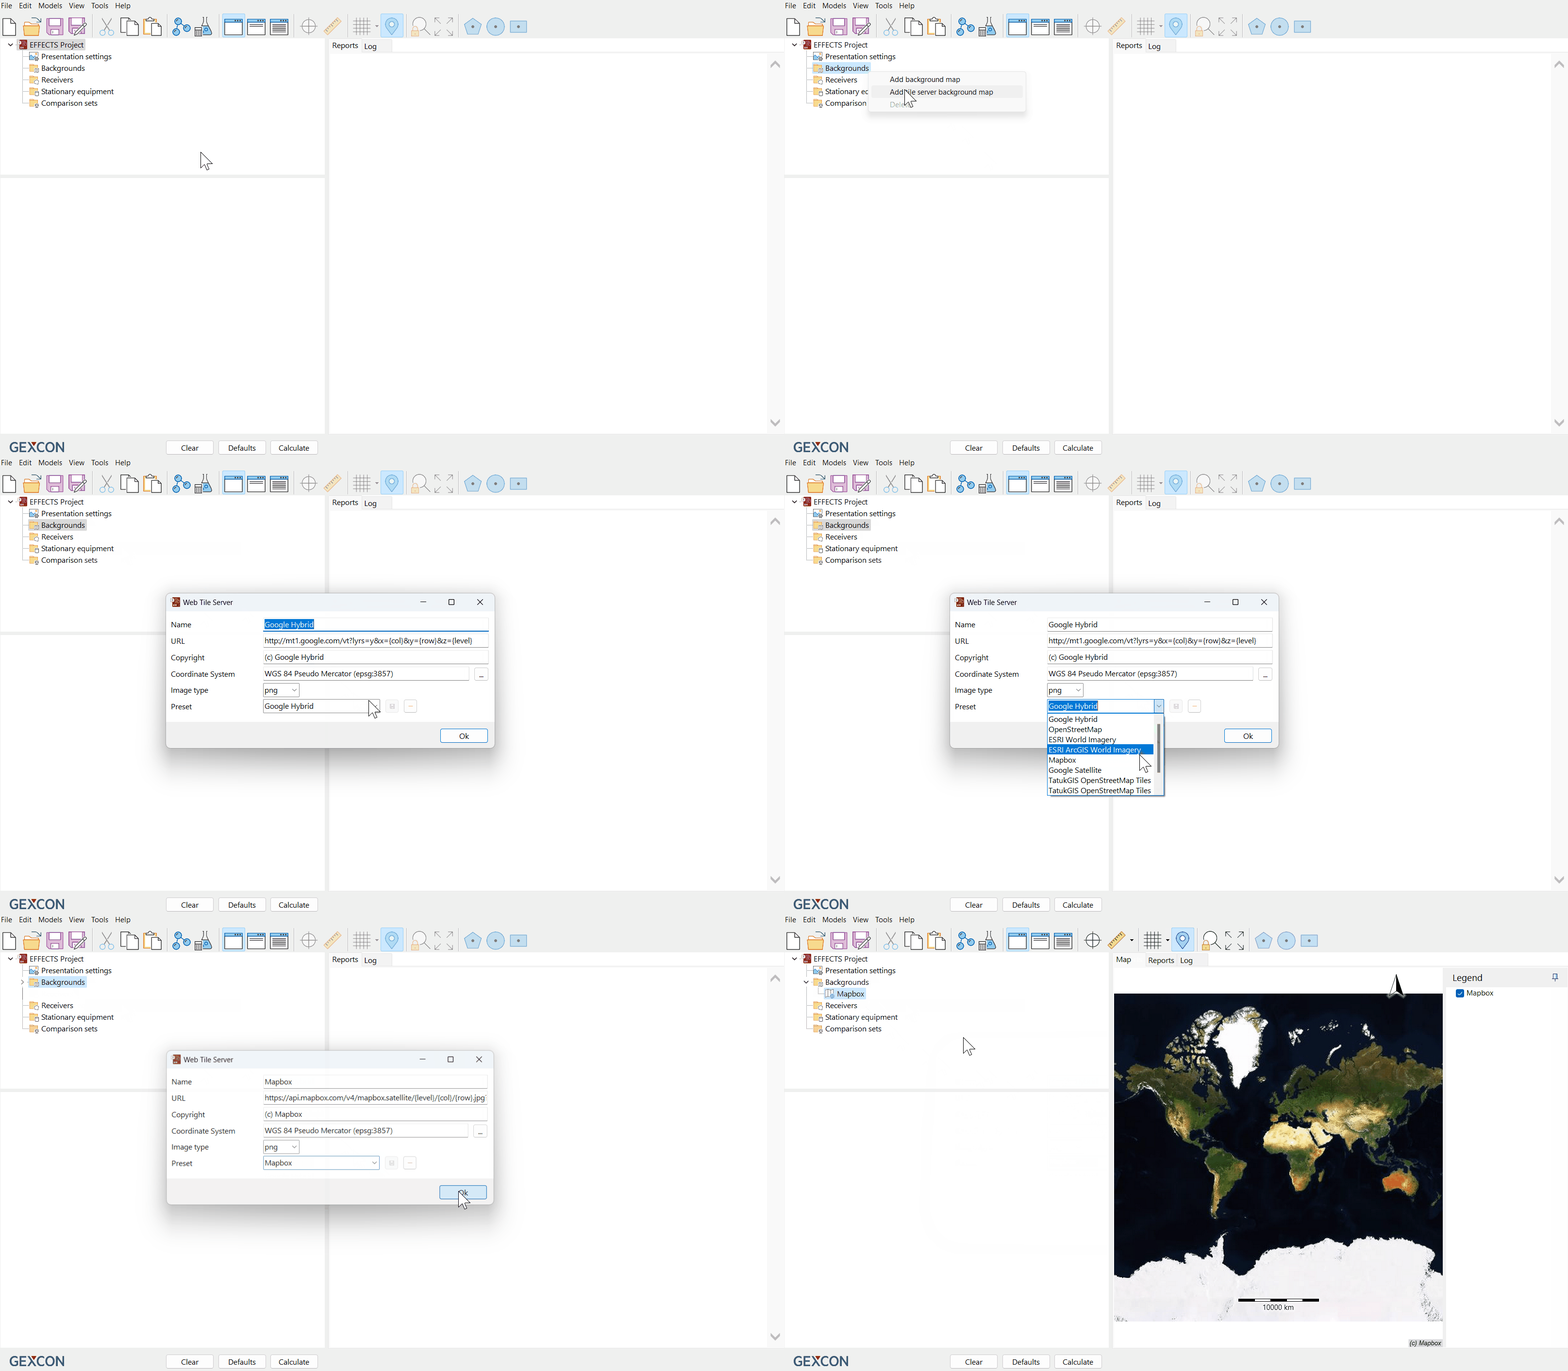
Right-click on the "Backgrounds" node of the project tree.
Select "Add tile server background map".
This action will open the "Web Tile Server" dialogue window.
In the dialogue window, choose your desired tile server from the list provided in the drop-down menu labelled "Preset".
Click “OK” to load your selected tile server.

Some additional considerations:
License requirement: Note that all tile servers provided by default in EFFECTS and RISKCURVES can be used straight away. However, other tile servers may require a license from the map tiles' publisher. Please refer to your local provider for the URL of the corresponding tile server.
Custom URLs: While some free examples like OpenStreetMap are readily available in EFFECTS and RISKCURVES, users can add their own URLs for other map service providers such as Mapbox, Google, ESRI ArcGIS, or Bing maps. However, please refer to those providers for licensing options.
Loading a new tile server
To add a user-specific tile server, follow the steps below:
Open "Web Tile Server" dialogue window
Right-click on the "Backgrounds" node of the project tree.
Select "Add tile server".
This action will open the "Web Tile Server” dialogue window.
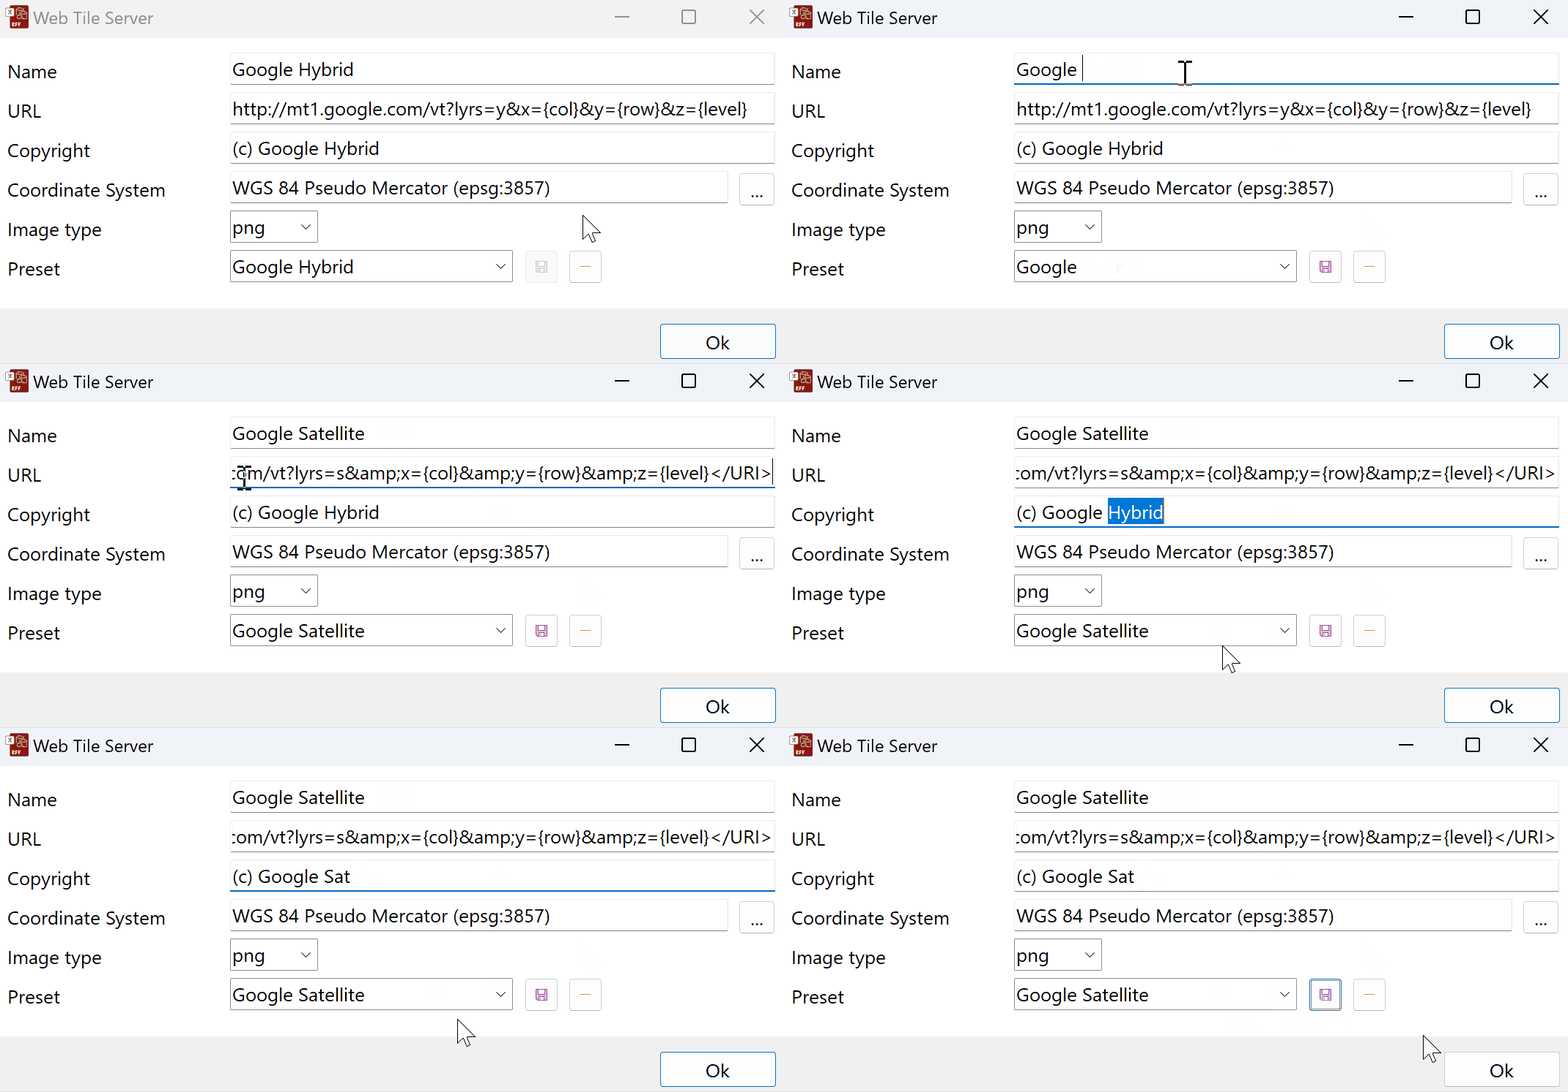
Name the server: Type the chosen- name for the new tile server in the "Name” category
Enter the URL: Clear the information listed in the “URL” box and paste the URL for the new tile server.
Copyright details: Ensure the correct copyright details are provided to avoid copyright infringements.
Coordinate system:
Confirm that the coordinate system applied in the presentation settings matches that of the tile server to avoid projection correction and increase loading speed.
Most tile servers provide data in WGS-84 Pseudo Mercator (espg: 3857) which is also the default for the coordinate system. However, specific local tile servers may prefer a specific coordinate system to apply, because their tiles-data is not even usable in other projections.
Set image type: Choose the appropriate image type for the server.
Save: After entering all the user-specific information, click the save button located next to the preset drop down menu to store the new tile server as a preset choice to be usable in future sessions.

Additional details
The URL for the tile server can contain four arguments, to be used to specify specific properties:
{0} – "Number" variable to use multiple tile servers, substituted with numbers 1,2,3 and 4.
{level} – Zoom level for the tile.
{col} – X coordinate of the tile.
{row} – Y coordinate of the tile.
By following these steps and considerations, users can seamlessly use and integrate tile servers into their projects, enhancing their visualisation and analysis capabilities in EFFECTS and RISKCURVES.

